Steps
- 1
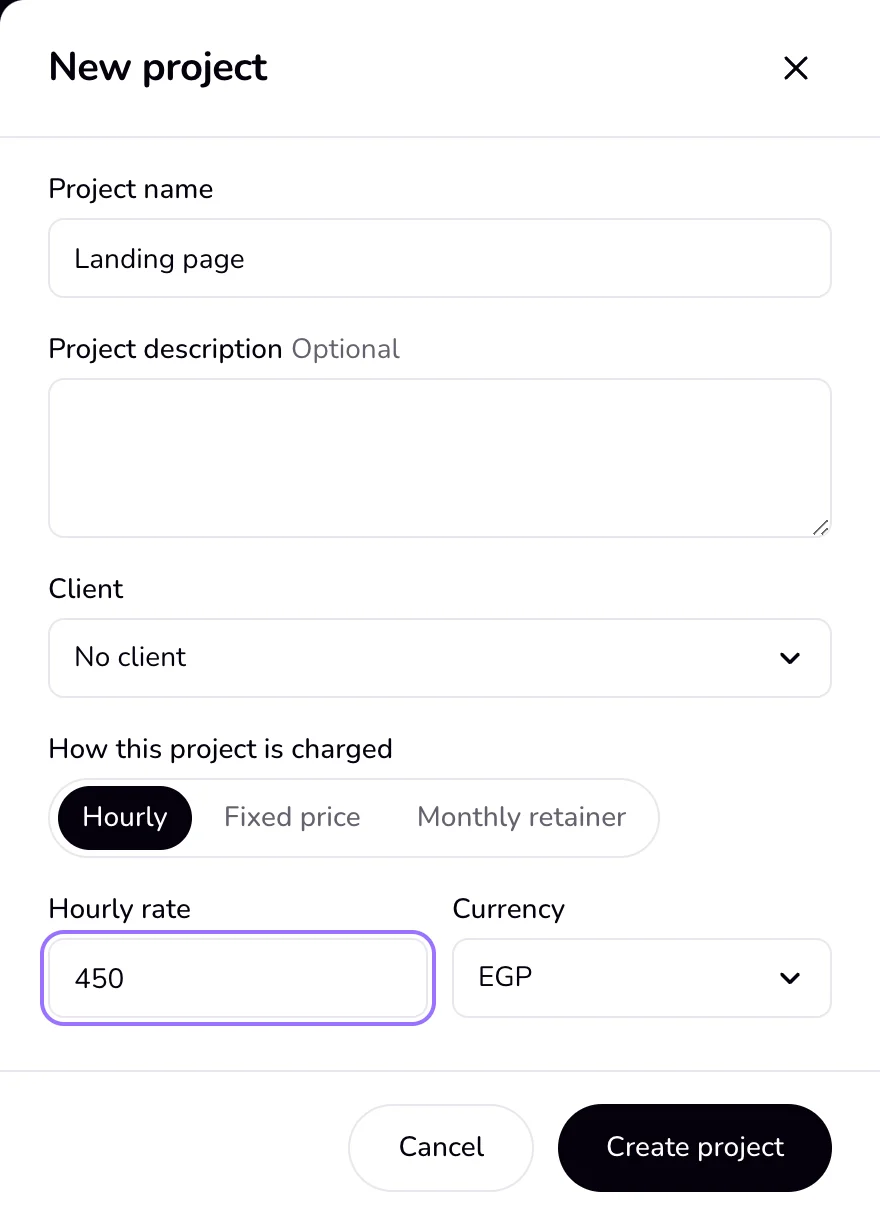
Open “Projects” in the sidebar and press “New project”. A panel opens on the side.
- 2
Type the “Project name”. The rest is optional: “Project description”, the “Client” (pick one, or choose “+ New client” to add one here), how the project is charged (“Hourly”, “Fixed price”, or “Monthly retainer”), and the “Hourly rate” with its “Currency”.
- 3
Press “Create project”.
- 4
Open the project by pressing its row in the list.
- 5
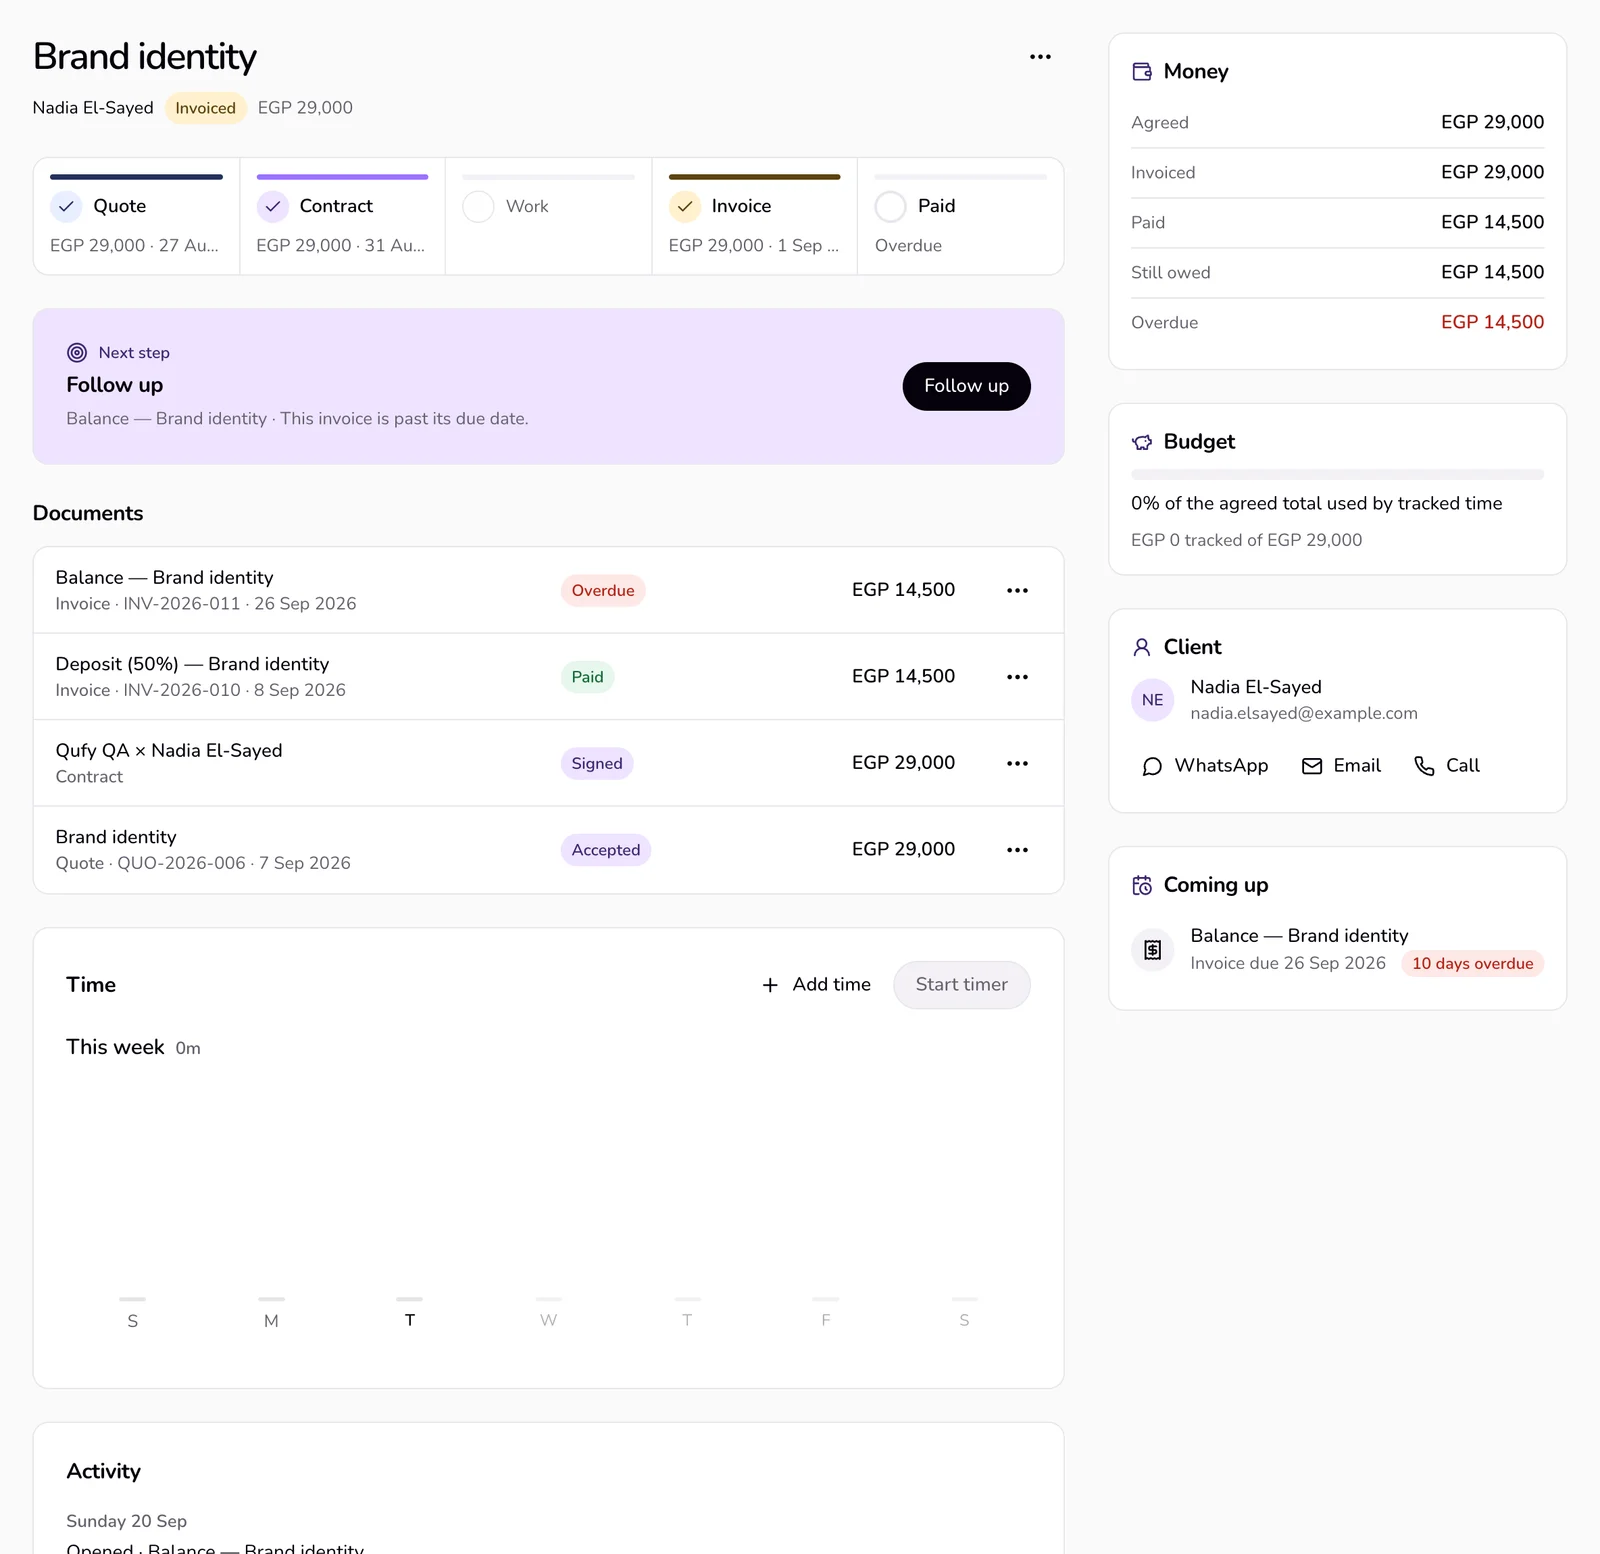
Read the top of the page: the name, the client, the project status, and the price. Under it, the project steps show where the work is: Quote, Contract, Work, Invoice, Paid.
- 6
Press the button in the “Next step” card to do what the project needs now, for example “Deposit invoice”, “Invoice hours”, or “New quote”.
- 7
For anything else, open “⋯” next to the name: “New quote”, “New invoice” (or “Invoice hours” on an hourly project), “Edit”, and “Archive”. “Delete” is there only while nothing on the project has been sent.
Good to know
- The “Next step” card shows the most urgent thing first: a payment to review, a contract to create, an overdue invoice to follow up, unbilled hours, then the deposit, the balance, or a first quote. Before a deposit invoice you can change the deposit “Percent”.
- Every invoice button opens the invoice filled and unsaved. Nothing is created until you save or send it.
- Under “Documents”, each row has at most one button (“Send”, or a deposit or balance invoice on a signed contract) and “⋯” with “Edit in tool”, “Copy link” while a link is live, and “Share again” on a signed contract. Press a row to open the document. “Activity” lists what happened, newest first.
- At the side, “Money” shows “Agreed” on a fixed price, “Invoiced”, “Paid”, “Still owed”, the overdue part in red, and, on an hourly project, “Unbilled time” with “Invoice hours”. On a fixed price, “Budget” compares the value of tracked time with the agreed total (amber above 80%, red above 100%). “Client” has WhatsApp, email, and call, and “Coming up” lists this project's dates. A retainer has its own “Monthly retainer” module.
- The “Time” card has “Add time” and “Start timer” (or “Stop”), this project's week chart, and its sessions by day, each with “⋯” for “Edit” and “Delete”. The timer needs an hourly rate on the project.
- You rarely make a project by hand: the first time you send a quote that has a client and no project, Qufy creates one, named after the quote or, when the quote has no title of its own, after the client, and puts the quote in it. The contract and the deposit and balance invoices made from it join the same project.
- To put an existing quote, contract, or invoice on a project, open “Documents”, press “⋯” on its row, choose “Link to a project…”, pick the “Project”, and press “Save”. In the editor, the same choice is in “⋯”.
- Changing the rate does not change hours already logged: each session keeps the rate from when it started. Archived documents are left out of the page.
If something goes wrong
- “Add a project name.”
- Type a name, then press “Create project” again.
- “Set an hourly rate before starting.”
- Choose “Edit” under “⋯”, add an “Hourly rate”, and press “Save”. Then start the timer.
- “This project has documents that went to a client, so it can only be archived.”
- Choose “Archive” under “⋯” instead. The project leaves your lists and keeps its documents and time.
Last updated 6 Oct 2026
Was this helpful?