Steps
- 1
Open “Time” in the sidebar.
- 2
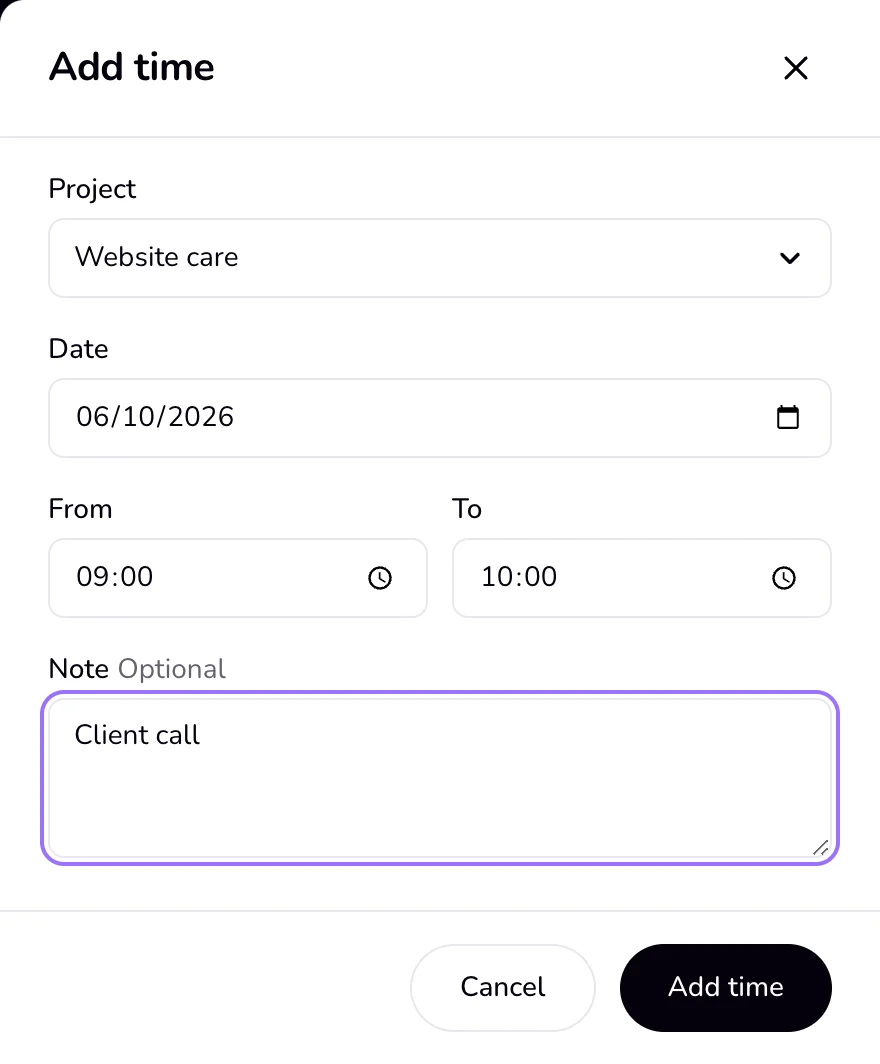
Press “Add time” at the top of the page (or in a project page's “Time” card). A panel opens on the side.
- 3
Choose the “Project”. Only projects with an hourly rate are listed; from a project page it is already chosen.
- 4
Pick the “Date”.
- 5
Set “From” and “To”. They start at 09:00 and 10:00.
- 6
Add a “Note” if you like, up to 200 characters.
- 7
Press “Add time” at the bottom of the panel.
Good to know
- Every session follows the same rules: the end is after the start, it lasts at least 1 minute and at most 24 hours, it is not in the future (with one minute of leeway), and it does not overlap another session, including a timer that is running now.
- “From” and “To” are on the same date. For work that ran past midnight, add two sessions, one for each date.
- The session uses the project's current hourly rate. It counts in your totals and can go on an invoice like a timed session.
- To bring many sessions at once from Toggl, Clockify, or a spreadsheet, use Settings → “Import” instead.
- The Mac app has its own “Add time” on its “Hours” page.
If something goes wrong
- “The end has to be after the start.”
- Make “To” later than “From”. Also check that a project and a date are chosen.
- “Under a minute is not saved.”
- Make the session at least one minute long.
- “A session can be at most 24 hours.”
- Shorten the session, or split it into two.
- “That time is in the future.”
- Pick a time that has already passed. For today, set “To” no later than now.
- “That time overlaps another session.”
- Look on the Time page for a session at that time, and check the timer in the top bar. Pick another time, or edit the other session first.
- “Add an hourly rate on a project first.”
- The “Project” list is empty because no project has an hourly rate. Add one with “Edit” in a project's “⋯”.
Last updated 6 Oct 2026
Was this helpful?