Steps
- 1
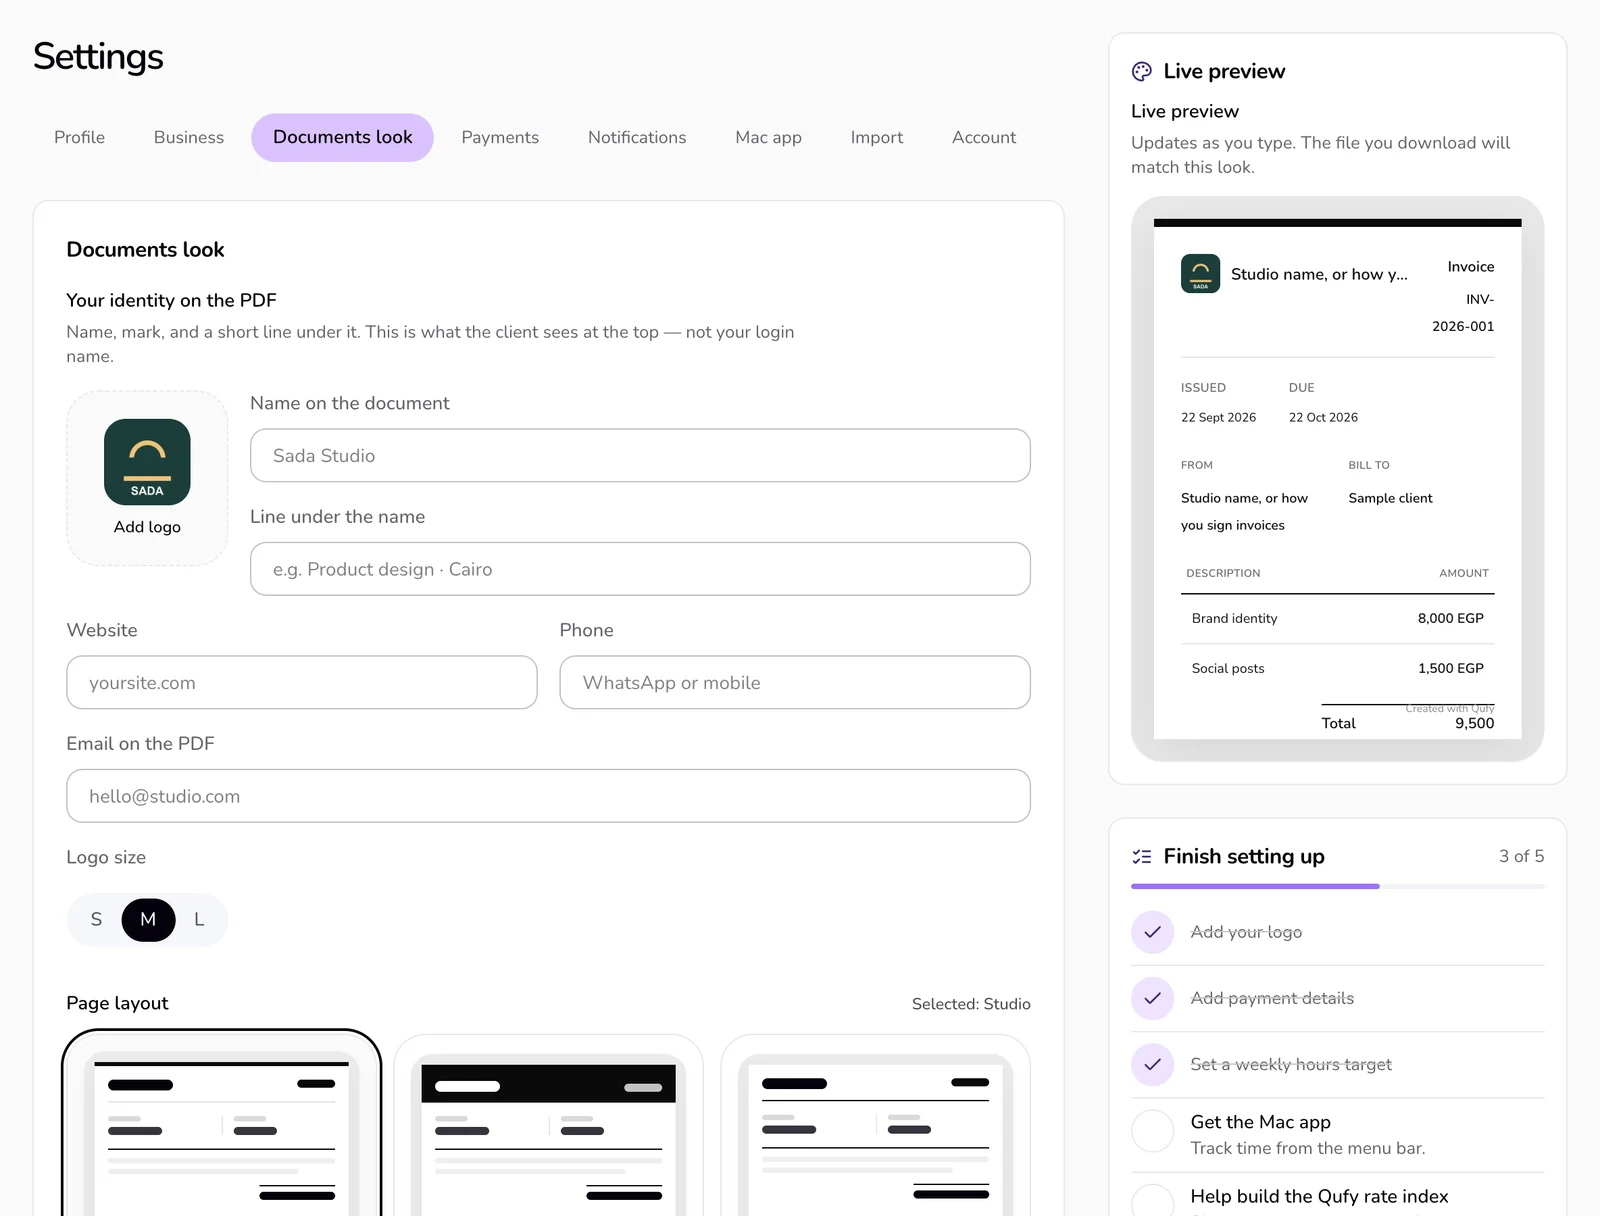
Open “Settings” and choose “Documents look” in the bar of sections.
- 2
Press “Add logo” and choose a PNG, JPEG or WebP image up to 1.5 MB. It uploads as soon as you choose it.
- 3
Fill “Name on the document” and “Line under the name”.
- 4
Add “Website”, “Phone” and “Email on the PDF” if you want them on your documents.
- 5
Choose the “Logo size”: S, M or L.
- 6
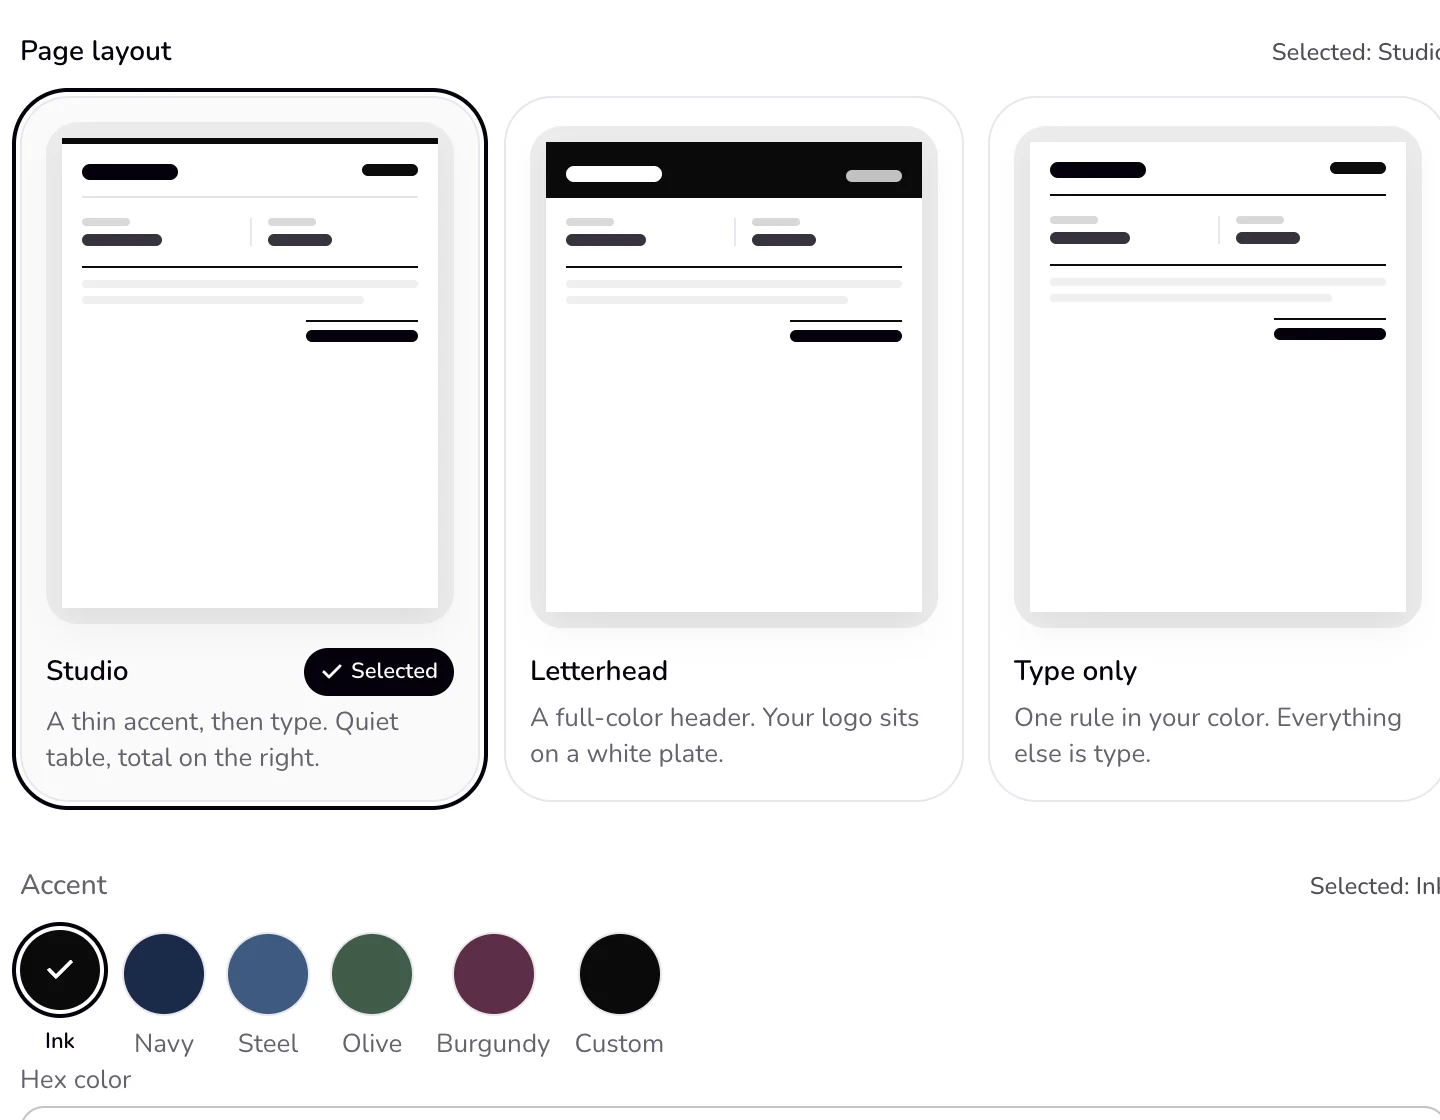
Choose a “Page layout”: “Studio”, “Letterhead” or “Type only”.
- 7
Choose an “Accent”: Ink, Navy, Steel, Olive or Burgundy, or “Custom” for your own colour. You can also type a “Hex color”.
- 8
Add a “Footer line”, such as bank details or a thank-you, or leave it blank.
- 9
Press “Save look”.
Good to know
- This look is yours. Quotes, invoices and contracts use it, including the client page and the PDF your client saves. “Email on the PDF” and “Phone” also become the contact buttons (email and WhatsApp) on the client page.
- “Name on the document” is what the client sees at the top. It does not change your account name.
- Studio: a thin accent line, then type. Letterhead: a full-colour header, with your logo on a white plate. Type only: one rule in your colour.
- Limits: the name up to 80 characters, the line under it up to 120, and the footer up to 240.
- The “Live preview” beside the section (below it on a phone) changes as you edit. The logo is saved as soon as it uploads; everything else waits for “Save look”, which appears once you change something.
- Choosing a new logo replaces the old one.
If something goes wrong
- “The logo does not change after you choose a file.”
- Qufy shows no message when it refuses a logo. Check that the file is PNG, JPEG or WebP and no larger than 1.5 MB, then choose it again.
Last updated 6 Oct 2026
Was this helpful?