Steps
- 1
Choose “Settings” in the side menu, or open the account menu (your name at the bottom of the side menu) and choose “Settings”.
- 2
Choose a section in the bar at the top: “Profile”, “Business”, “Documents look”, “Payments”, “Notifications”, “Mac app”, “Import”, or “Account”. On a phone, slide the bar sideways to see them all.
- 3
Change a field. “Save changes” and “Discard” appear at the bottom of the section. Press “Save changes”; “Saved” confirms it.
Good to know
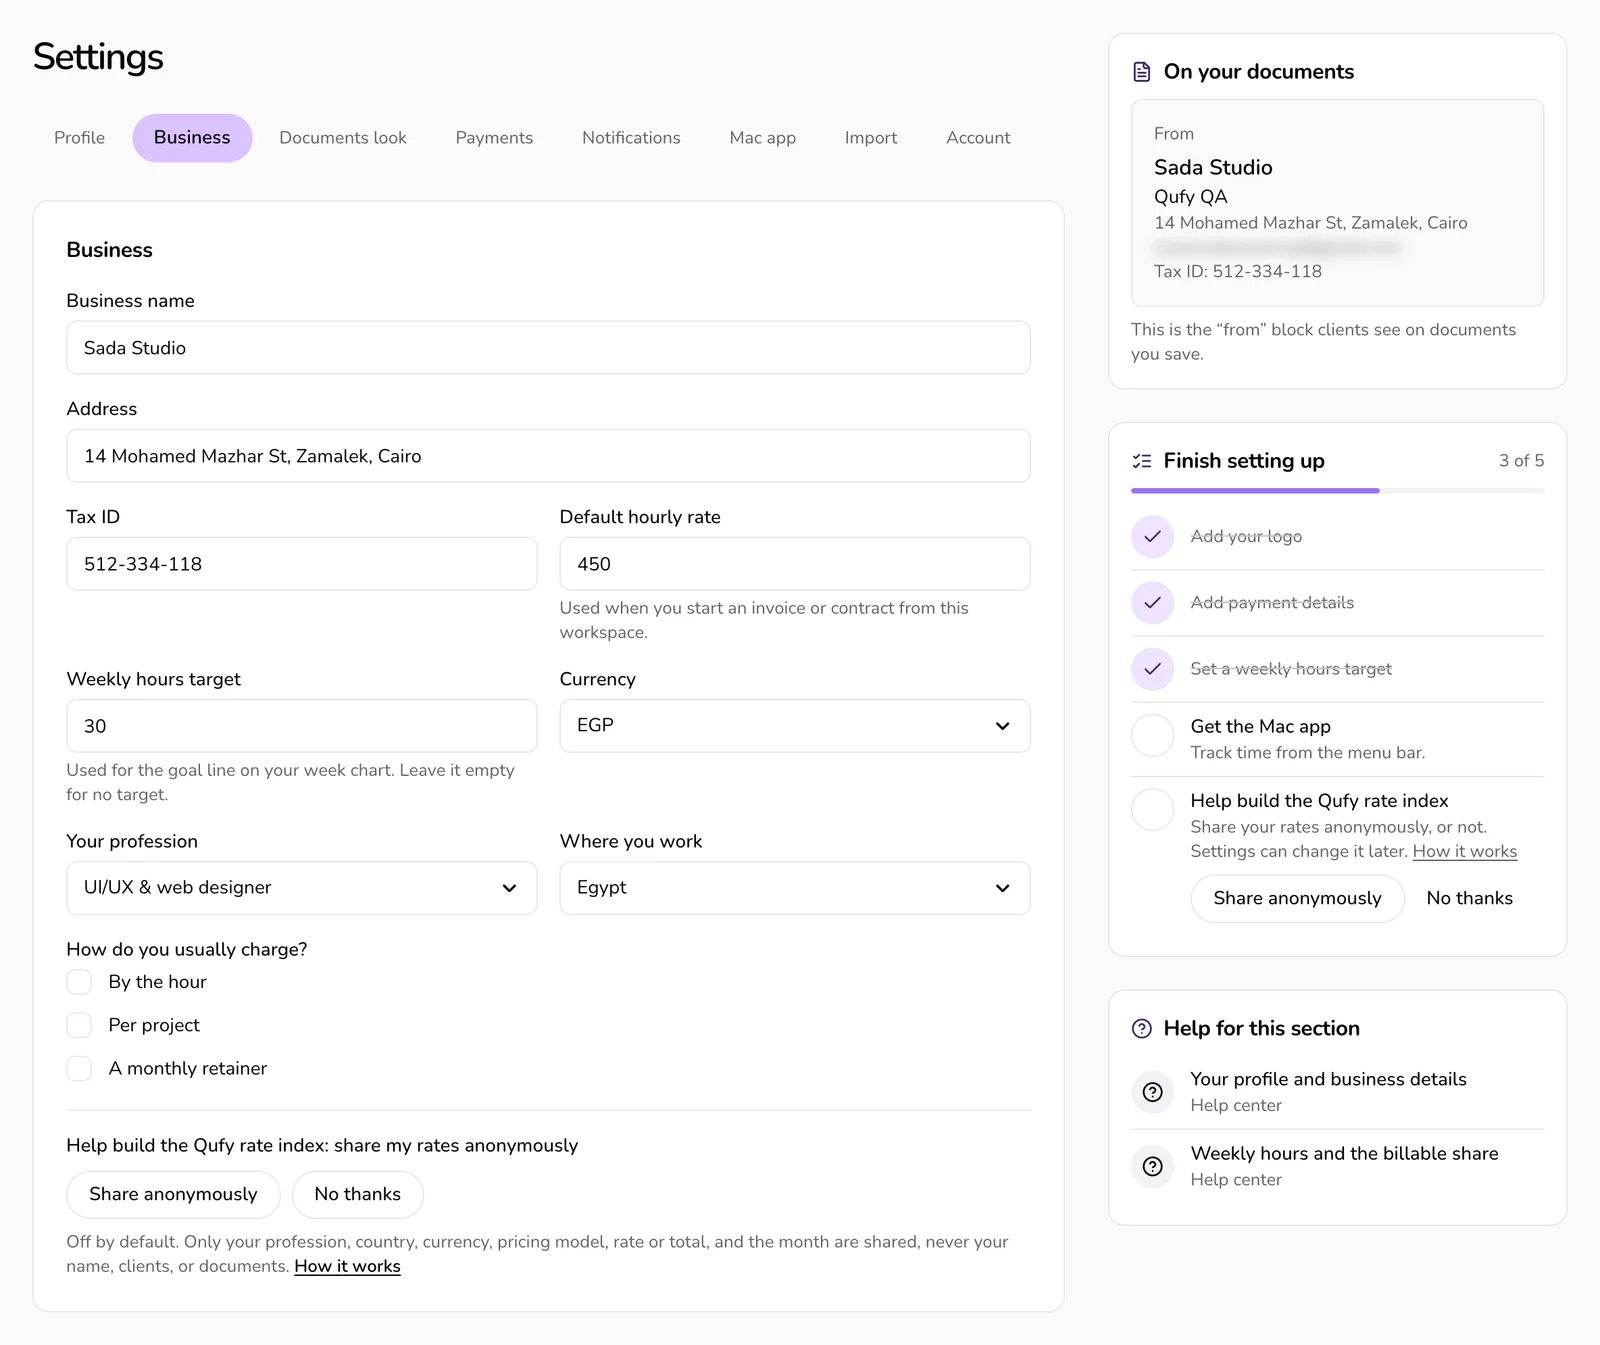
- Profile: your name and username; your email cannot be changed. Business: business name, address, tax ID, default hourly rate, currency, weekly hours target, profession, where you work, how you usually charge, and the rate index choice.
- Documents look: logo, colour, and layout of your PDFs and client pages. Payments: the payment details on your invoices. Notifications: the unbilled hours reminder and due-date emails to clients.
- Mac app: your paired Macs and “Enter a pairing code”. Import: bring clients, projects, past invoices, or time from a CSV file, and undo a recent import. Account: devices and sessions, “Export my data”, and “Delete account”.
- The side column follows the section: a preview of your name and details on documents, a live PDF preview, “What the client sees” for payment details, “Next reminders”, your Mac, or your devices. Under it come “Finish setting up” and two help articles for that section.
- Each section has its own address, such as /account/settings#business, so a link from elsewhere in Qufy opens the right one.
Last updated 6 Oct 2026
Was this helpful?