Steps
- 1
In the top bar, choose “New”, then “New contract”.
- 2
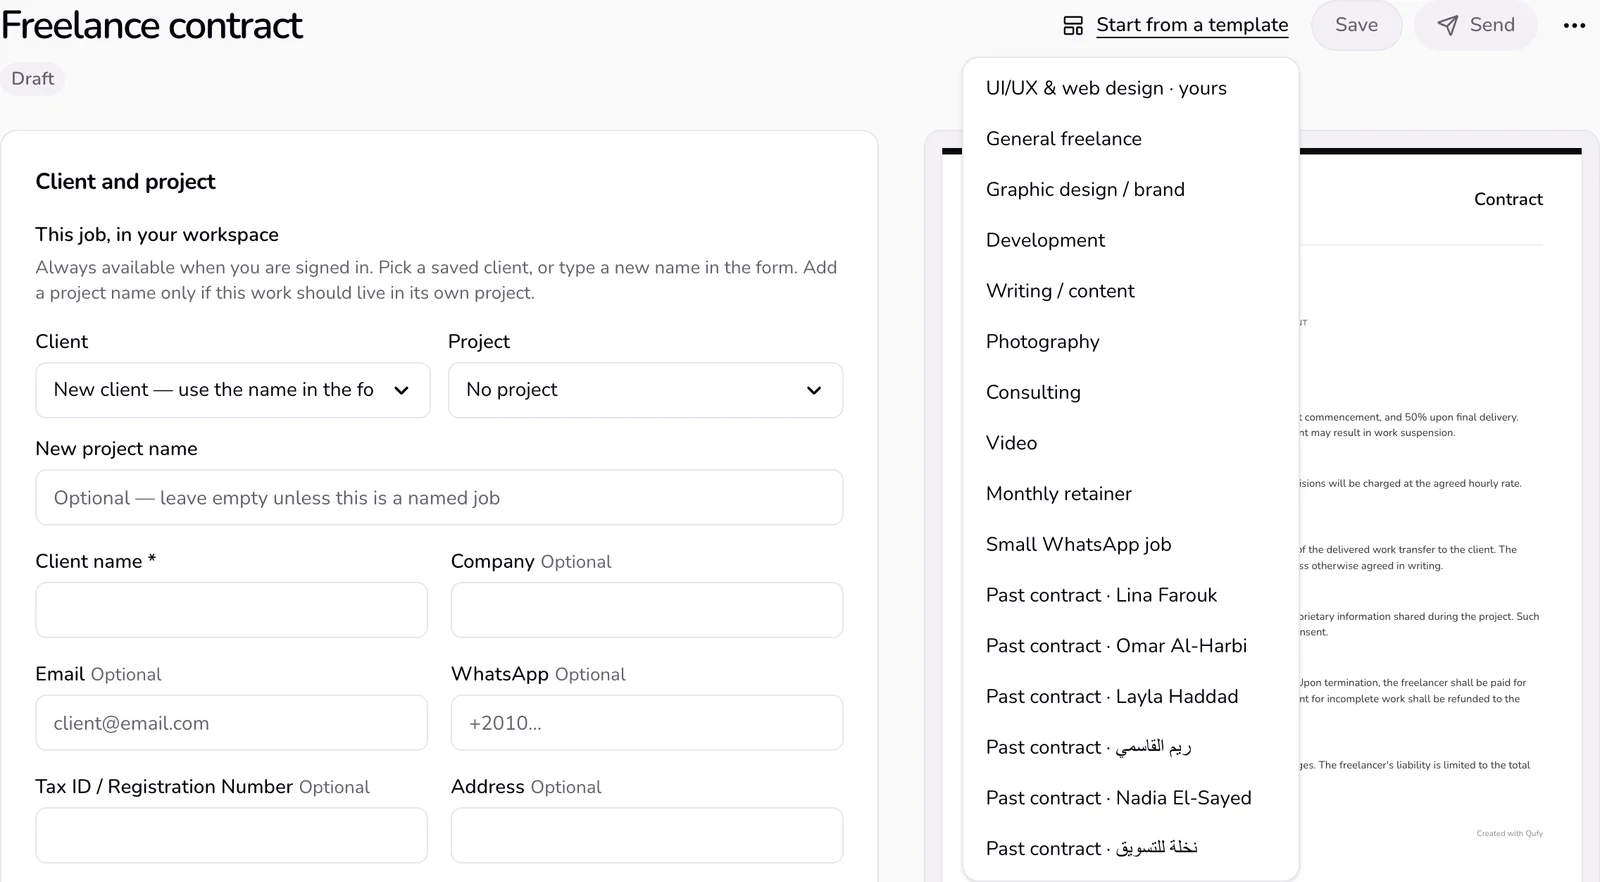
Press “Start from a template” and choose a pack. Your own templates come first (see “My templates”), then your profession's pack, marked “yours”; the others are General freelance, Graphic design / brand, UI/UX & web design, Development, Writing / content, Photography, Consulting, Video, Monthly retainer, and Small WhatsApp job. Signed in, your past contracts are listed too.
- 3
In “Client and project”, fill in the “Client name”. Under “Your details”, check “Your name” and “Your email”.
- 4
In “Scope and price”, write the “Project description”, or press “Write the scope” to have the assistant draft it. “Use outline” fills an empty scope with a fixed outline, with no AI.
- 5
Set the “Start date”, the “Total amount”, and the “Currency”. The “End date” is optional.
- 6
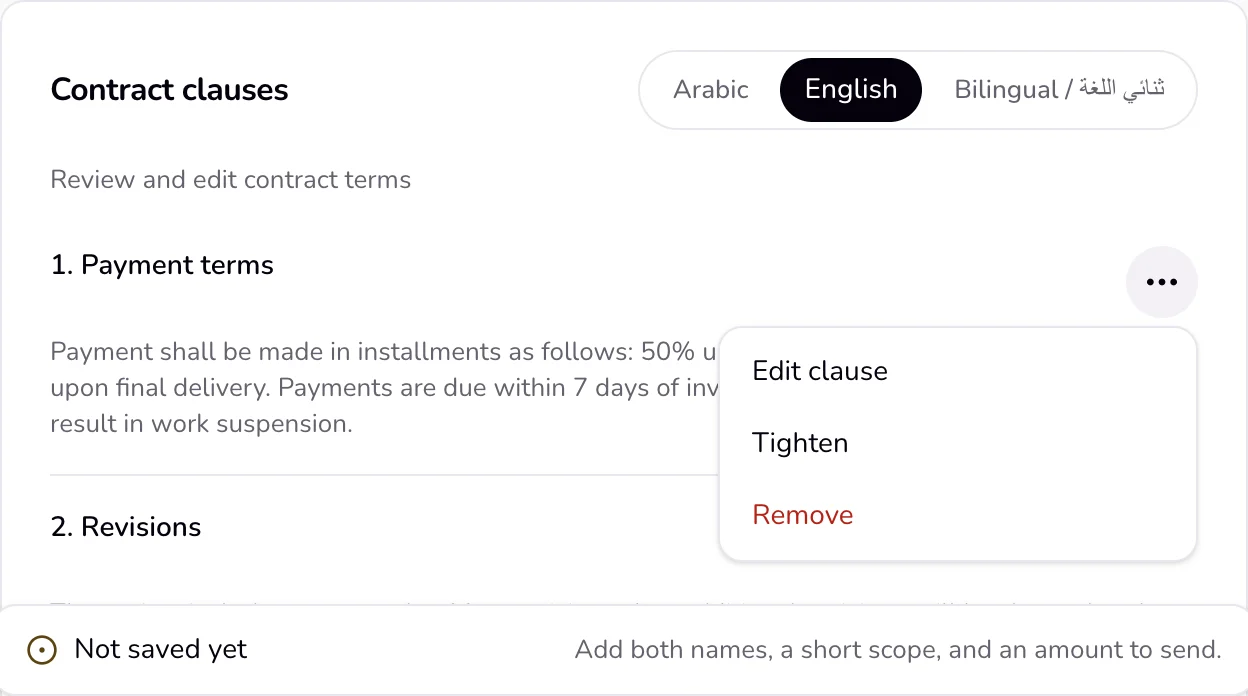
In “Contract clauses”, open a clause's “More” menu and choose “Edit clause”. When you are done, choose “Save changes” in the same menu.
- 7
Choose “Tighten” in a clause's menu to have the assistant make it shorter and clearer.
- 8
Press “Add clause” to open the “Clause library”: your own clauses and the built-in ones, by topic. Press “Insert” on one, or “Write a new clause” for a blank one.
- 9
If you do not like a change, press “Undo” right away.
Good to know
- Every pack has six clauses: Payment terms, Revisions, Intellectual property, Confidentiality, Termination, and Limitation of liability, with wording for that kind of work. Every clause has Arabic and English text.
- Choosing a pack after you edited clauses asks first: “This replaces the clauses you already edited.” Press “Keep mine” or “Use this pack”. If the scope is empty, a pack also puts a short prompt there; replace it with your own words.
- Required: your name, your email, the client name, the scope, the start date, and a total amount above 0.
- When the AI is not available, “Write the scope” and “Tighten” give ready template text instead, and “Suggest clauses” lists library clauses for the topics the contract does not cover yet. When today's assistant limit is used up, “Write the scope” and “Tighten” leave the text as it was.
- “Undo” shows for a few seconds after you tighten, add, or remove a clause, or replace the pack. It brings back the clauses as they were before that one change. Edits you make with “Edit clause” are not covered.
- The “Client message” card shows a “Ready-made scope-change note” for work outside the agreed scope. “Rewrite” in that card puts the note in the message.
- The paper preview at the side shows the contract as the client will read it. On a narrower screen, switch between “Edit” and “Preview”.
- The contract page and the client's page both say: “This is a template only — not legal advice.”
If something goes wrong
- “Add both names, a short scope, and an amount to send.”
- Fill in your name and email, the client name, the scope, and a total amount above 0.
- “Keep at least one clause.”
- Add another clause first, then remove the one you do not want, or edit the last clause instead.
- “The assistant isn't available right now. You can still fill this in by hand.”
- This can show in the “Qufy assistant” card. Choose a pack and edit its clauses by hand; everything else on the page still works.
Last updated 6 Oct 2026
Was this helpful?