Steps
- 1
In the sidebar, choose “Stats”.
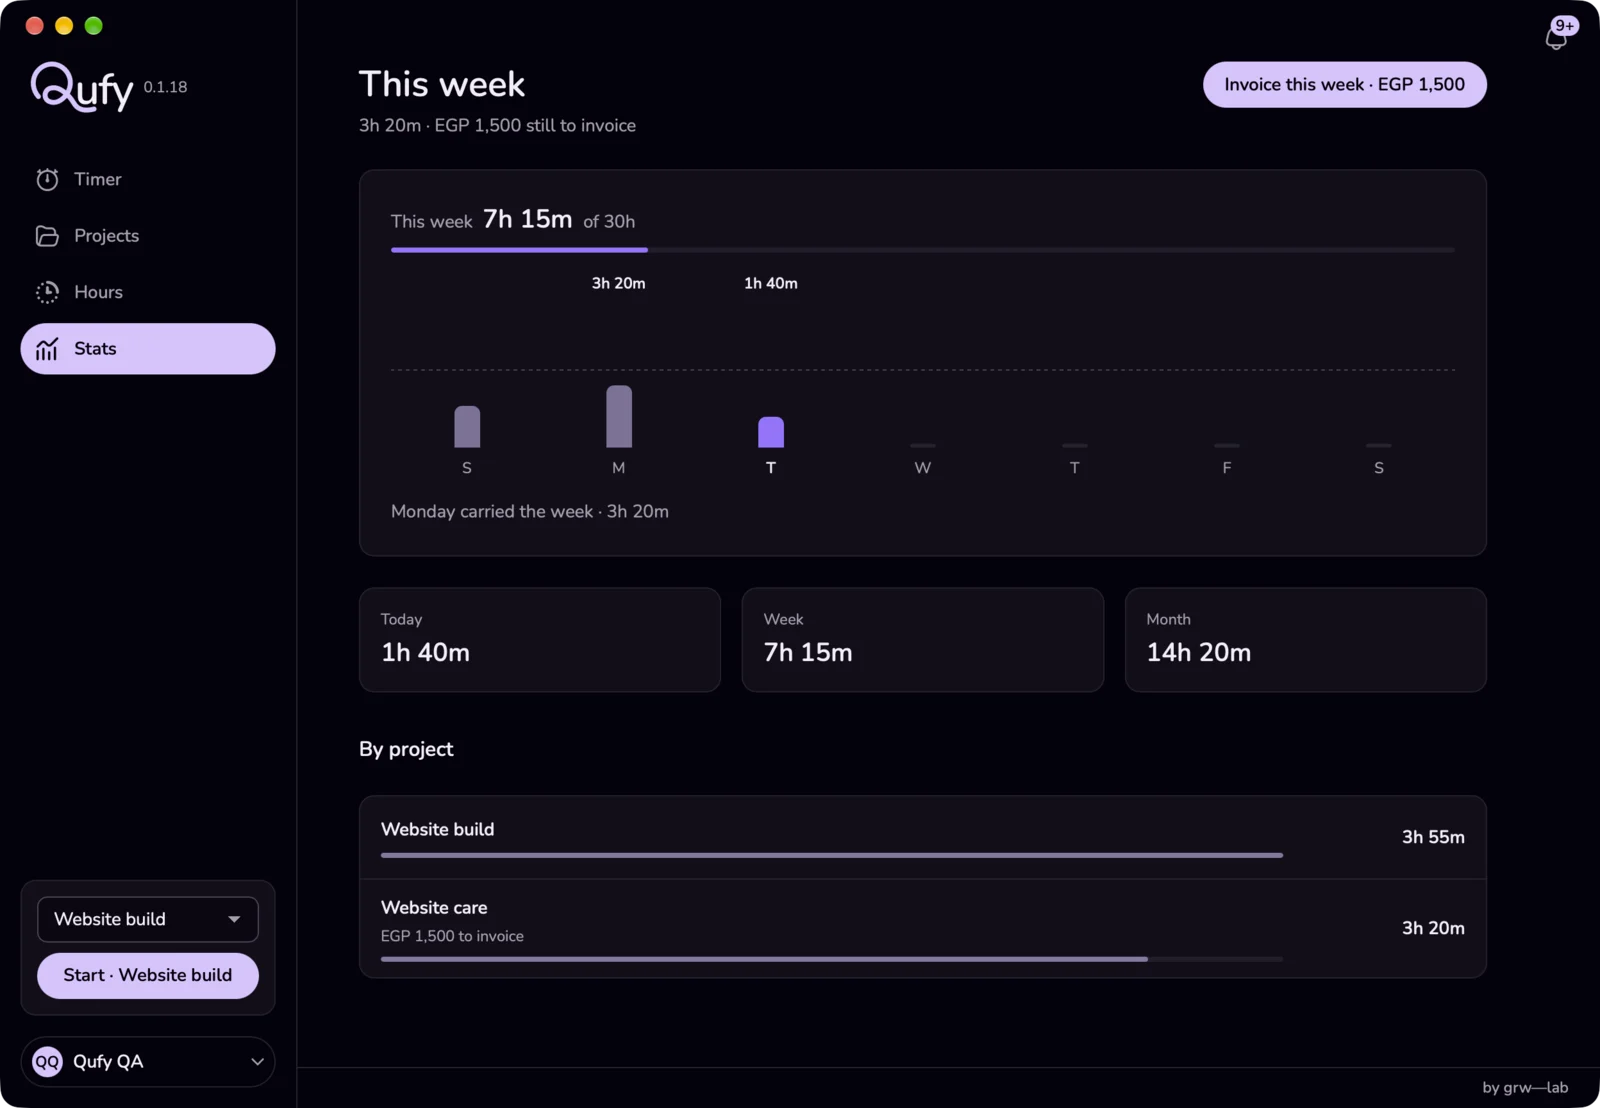
- 2
Read the sentence under “This week”, for example “6h 30m this week · USD 195 still to invoice”. When everything is on an invoice it ends with “all of it is on an invoice”; with no hours it reads “No hours yet this week”.
- 3
Look at the chart to see the hours for each day of the week.
- 4
Under the chart, read the line “{day} carried the week · {hours}”, which names your busiest day.
- 5
Check “Today”, “Week”, and “Month” for all projects, then “By project” for each project's hours and what is still “to invoice”.
- 6
To invoice the week, press “Invoice this week” (the button shows the amount). The website opens an invoice filled from those hours; nothing is saved until you save or send it there.
Good to know
- The chart has a fixed scale that steps up to 1, 2, 4, 8, 12, 16, or 24 hours to fit your busiest day. The week starts on Sunday (mirrored in Arabic), today is in the accent colour, and hours are written only over today and the busiest day. Empty and future days show a faint stub.
- A session counts on the day it started, in your Mac's local time. A session that starts on Tuesday at 23:00 and ends after midnight counts fully on Tuesday. Paused time is not counted.
- “Invoice this week” appears only when at least 1 minute is still unbilled. The invoice covers one project: the project chosen on the Timer page if it has unbilled time this week, otherwise the project with the most unbilled time. Nothing is created or sent until you save or send it on the website.
- Stats counts every session, not only the 12 listed on the Hours page.
- If you set a “Weekly hours target” on the website (Settings, “Business”), the Mac app shows the week's total as a share of that target, for example 12h of 30h, with a progress bar and a dashed goal line at the daily share. With no target, Stats shows the total without a goal.
Last updated 6 Oct 2026
Was this helpful?