Steps
- 1
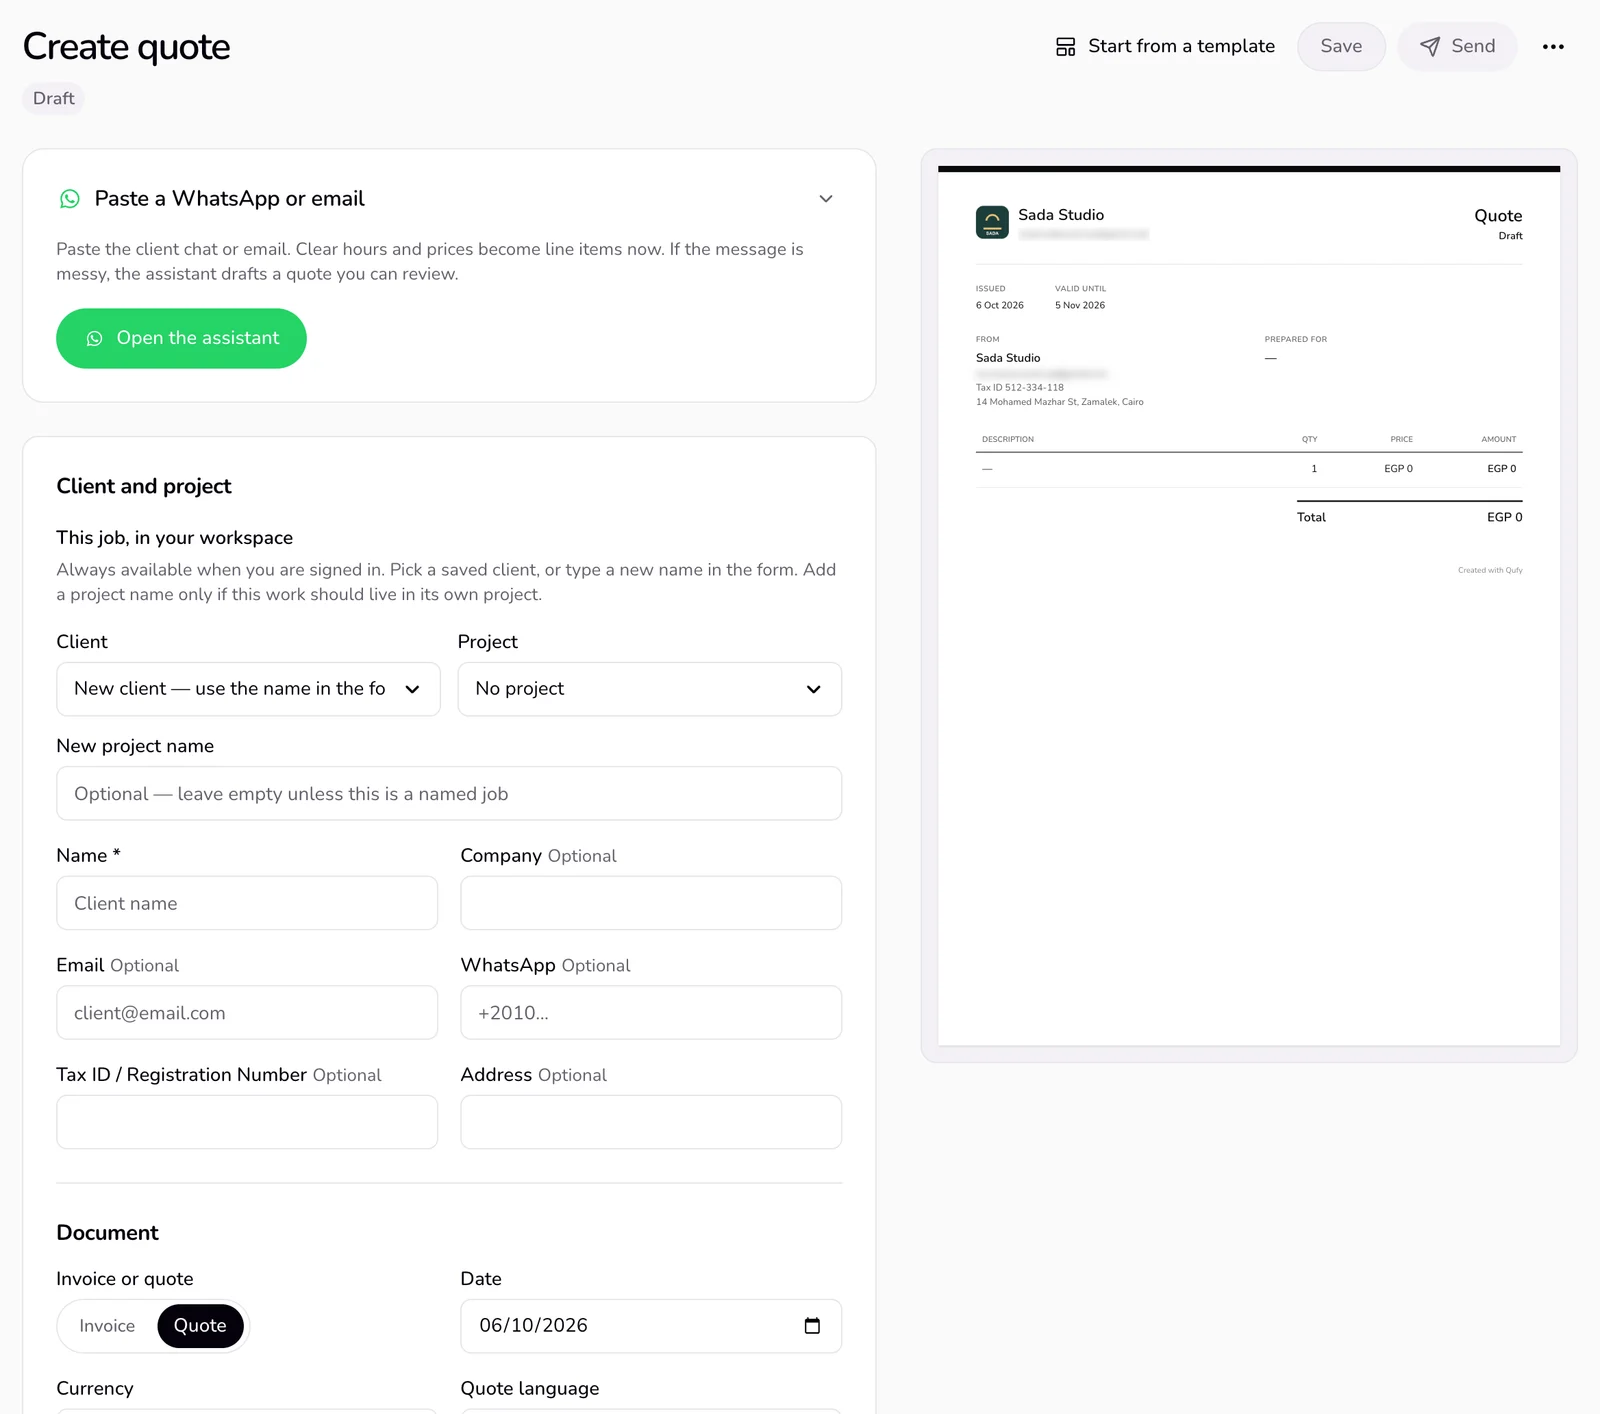
In the top bar, choose “New”, then “New quote”. The page title reads “Create quote”, with the “Draft” badge next to it.
- 2
To start from ready lines, press “Start from a template” and choose your profession (marked “yours”) or “Monthly retainer”. The lines have no prices; you add them.
- 3
In “Client and project”, choose a saved client or project, or type the client's “Name”. “Company”, “Email”, “WhatsApp”, “Tax ID / Registration Number”, and “Address” are optional; add the email if you want to send the link by email.
- 4
Under “Document”, make sure “Quote” is selected, then check “Date”, “Currency”, and “Quote language”.
- 5
Under “Your details”, check your “Name” and “Email”. They come from your account.
- 6
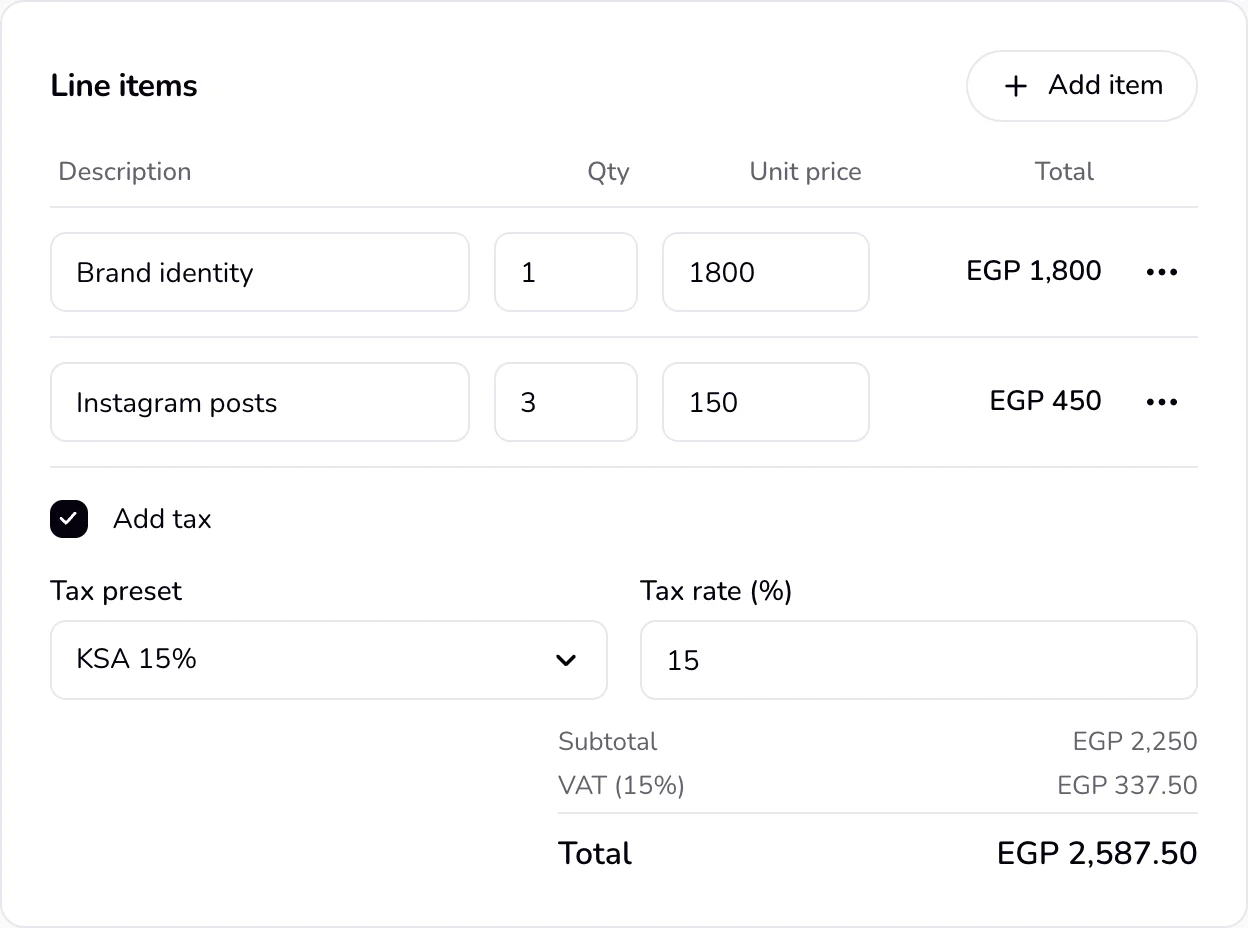
In “Line items”, fill in the description, “Qty”, and “Unit price” of each line. Press “Add item” for another line; to remove one, open its “More” menu and choose “Remove”.
- 7
If you charge VAT, tick “Add tax” under the lines and choose a “Tax preset”: “Egypt 14%”, “KSA 15%”, “UAE 5%”, or “Custom” with your own “Tax rate (%)”.
- 8
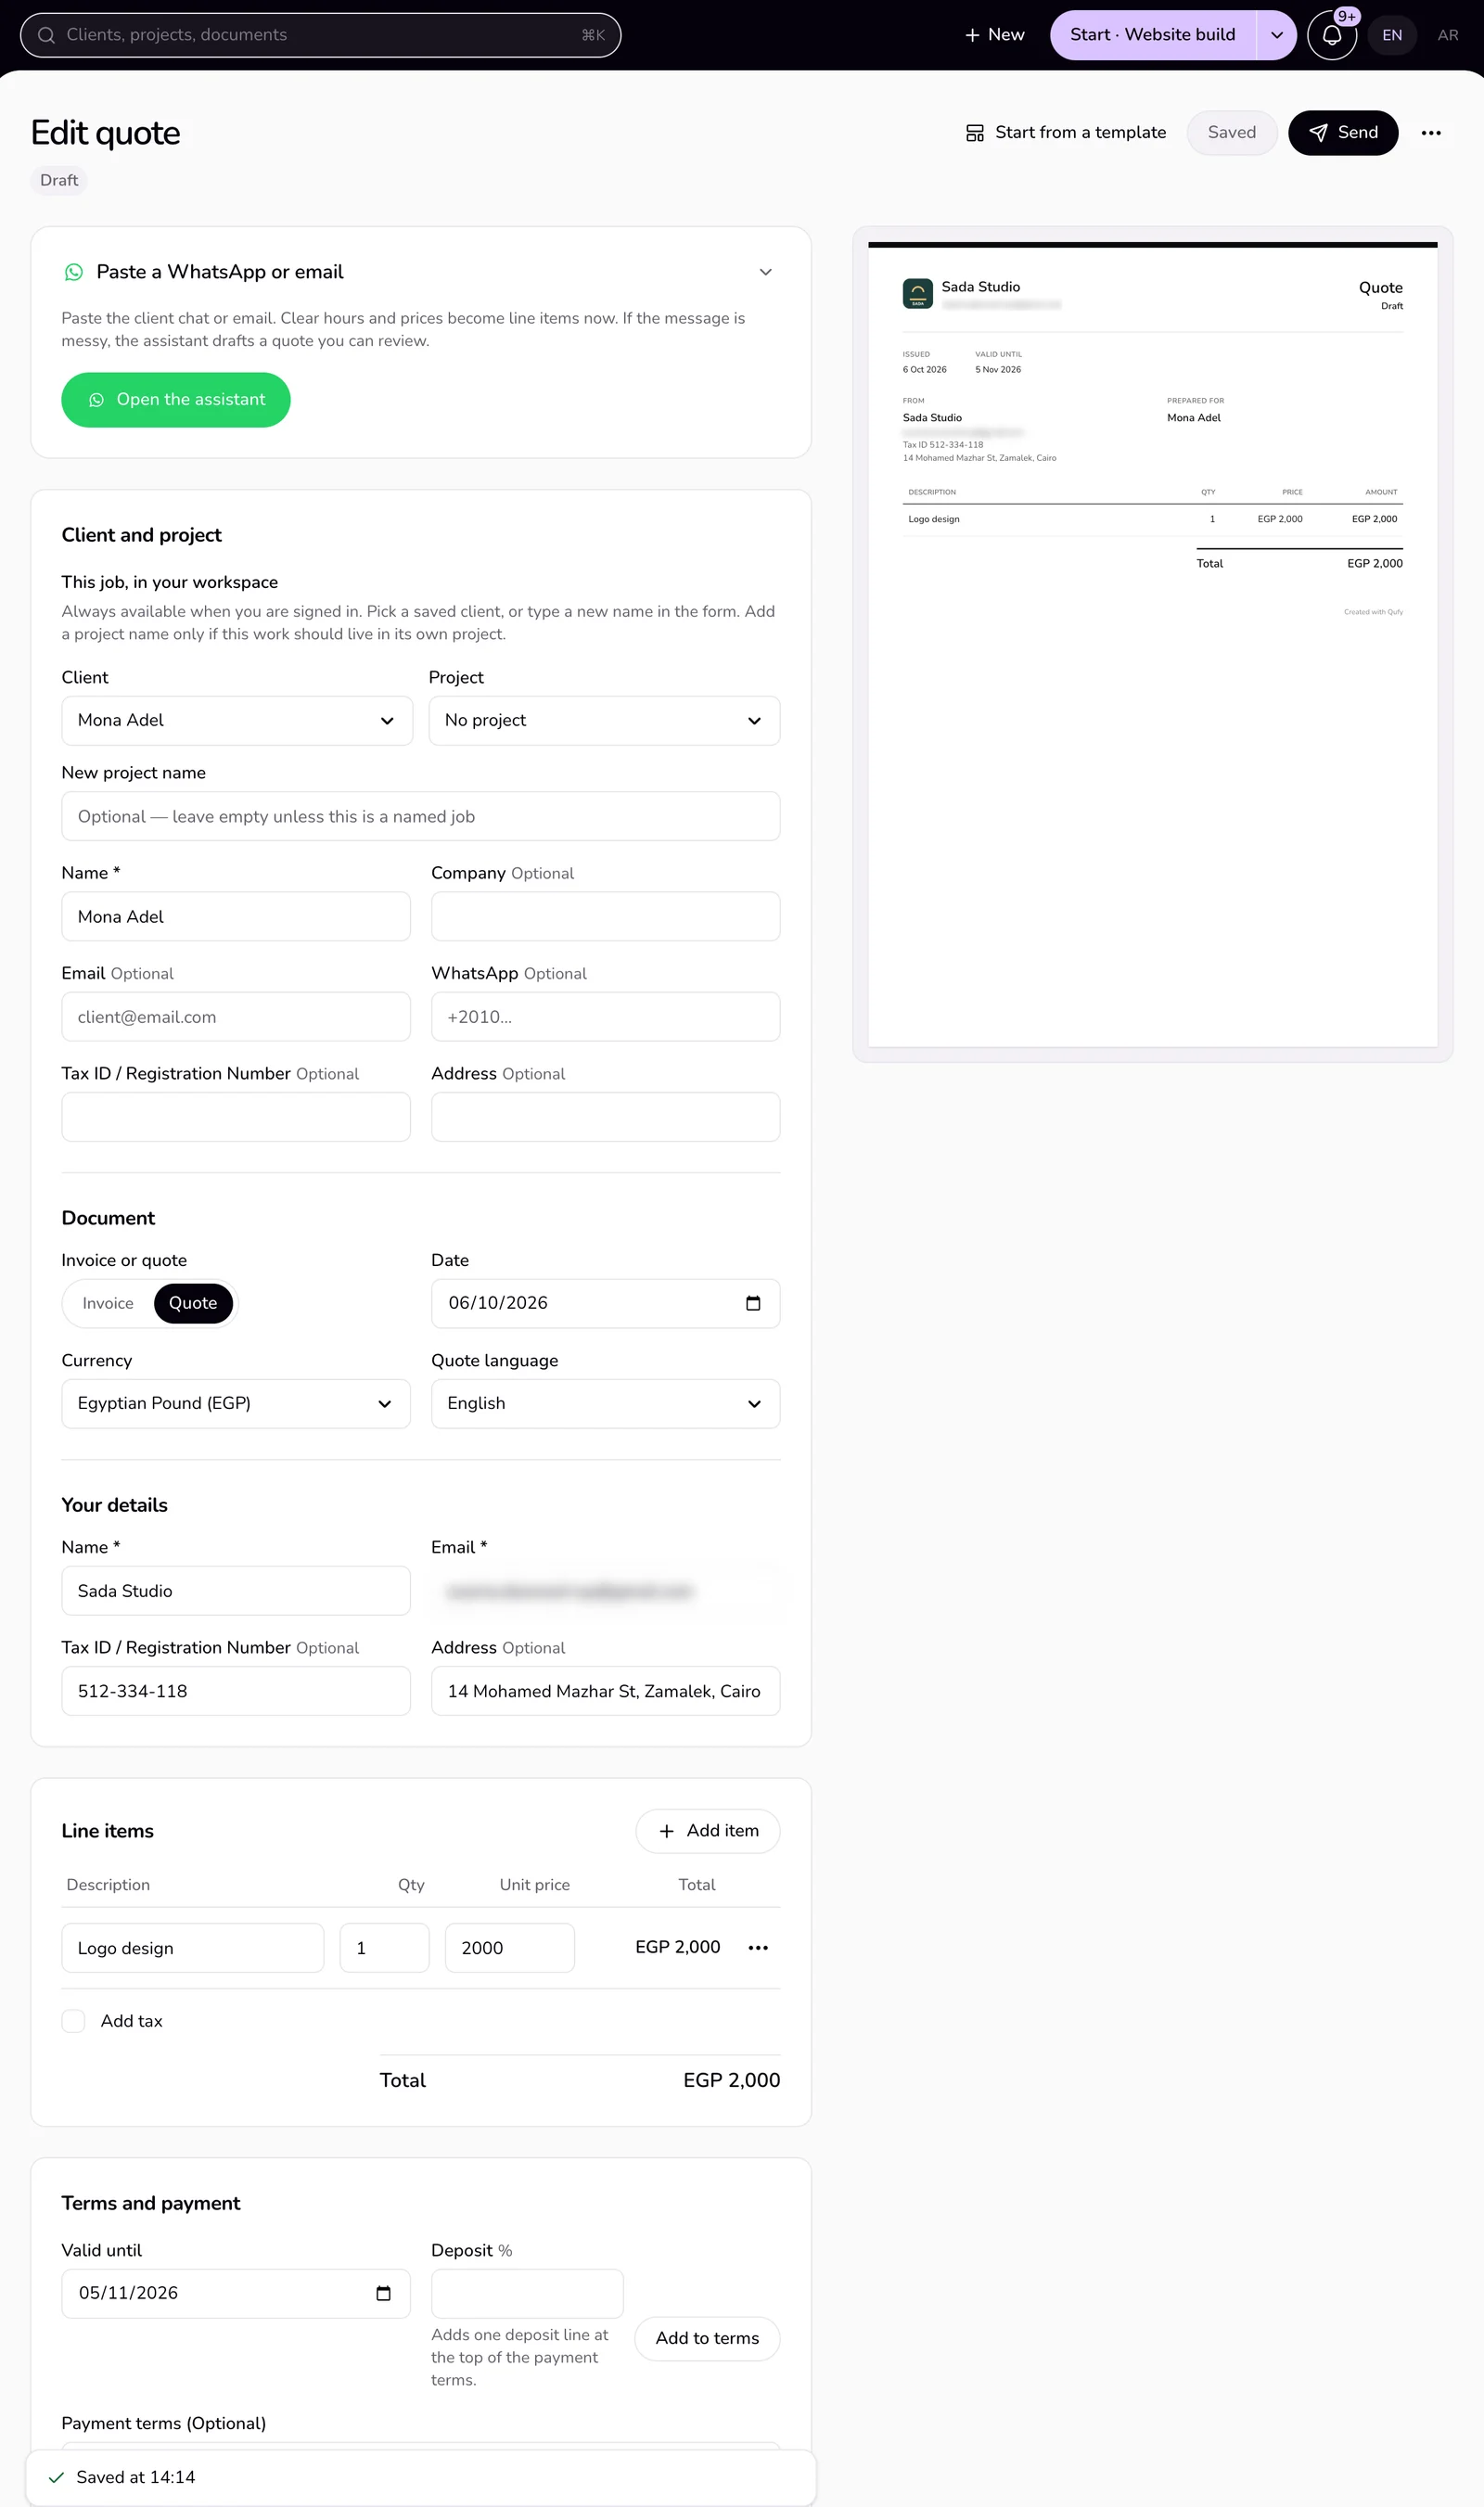
In “Terms and payment”, check “Valid until” and add “Payment terms” if you need them. To ask for a deposit, type the percent in “Deposit” and press “Add to terms”. Notes have their own “Notes” card.
- 9
Press “Save” at the top. The button changes to “Saved”, and the bar at the bottom of the form shows the time of the last save.
Good to know
- The paper preview at the side is the quote as the client and the PDF show it. On a narrower screen, switch between “Edit” and “Preview” above the form.
- A new quote starts with “Valid until” 30 days from today, the currency from your Settings (EGP when none is set), tax off, and the language of the site.
- Choosing a saved client fills their company, tax ID, and address only into empty fields. Each party's tax ID and address show on the quote only when they are filled on this quote.
- “Save” and “Send” work once you have your name, your email, the client name, a description on every line, and at least one line with a price above 0. Lines at 0 are allowed for work you include for free.
- Saving and sending a link need an account. Without one, the button at the top is “Download PDF”, and “WhatsApp” is in the “More” menu.
- Your work stays as a draft in this browser for 30 days, even before you save it.
- Payment details show only on invoices, not on quotes. On the quote's link, the client can accept or decline.
If something goes wrong
- “Add your name, the client, and at least one priced line to send.”
- This shows in the bar at the bottom while something is missing. Fill in your name and email under “Your details”, the client name, a description on every line, and a price on at least one line.
Last updated 6 Oct 2026
Was this helpful?